 AI
Elderberry wine
Level 3 · experienced
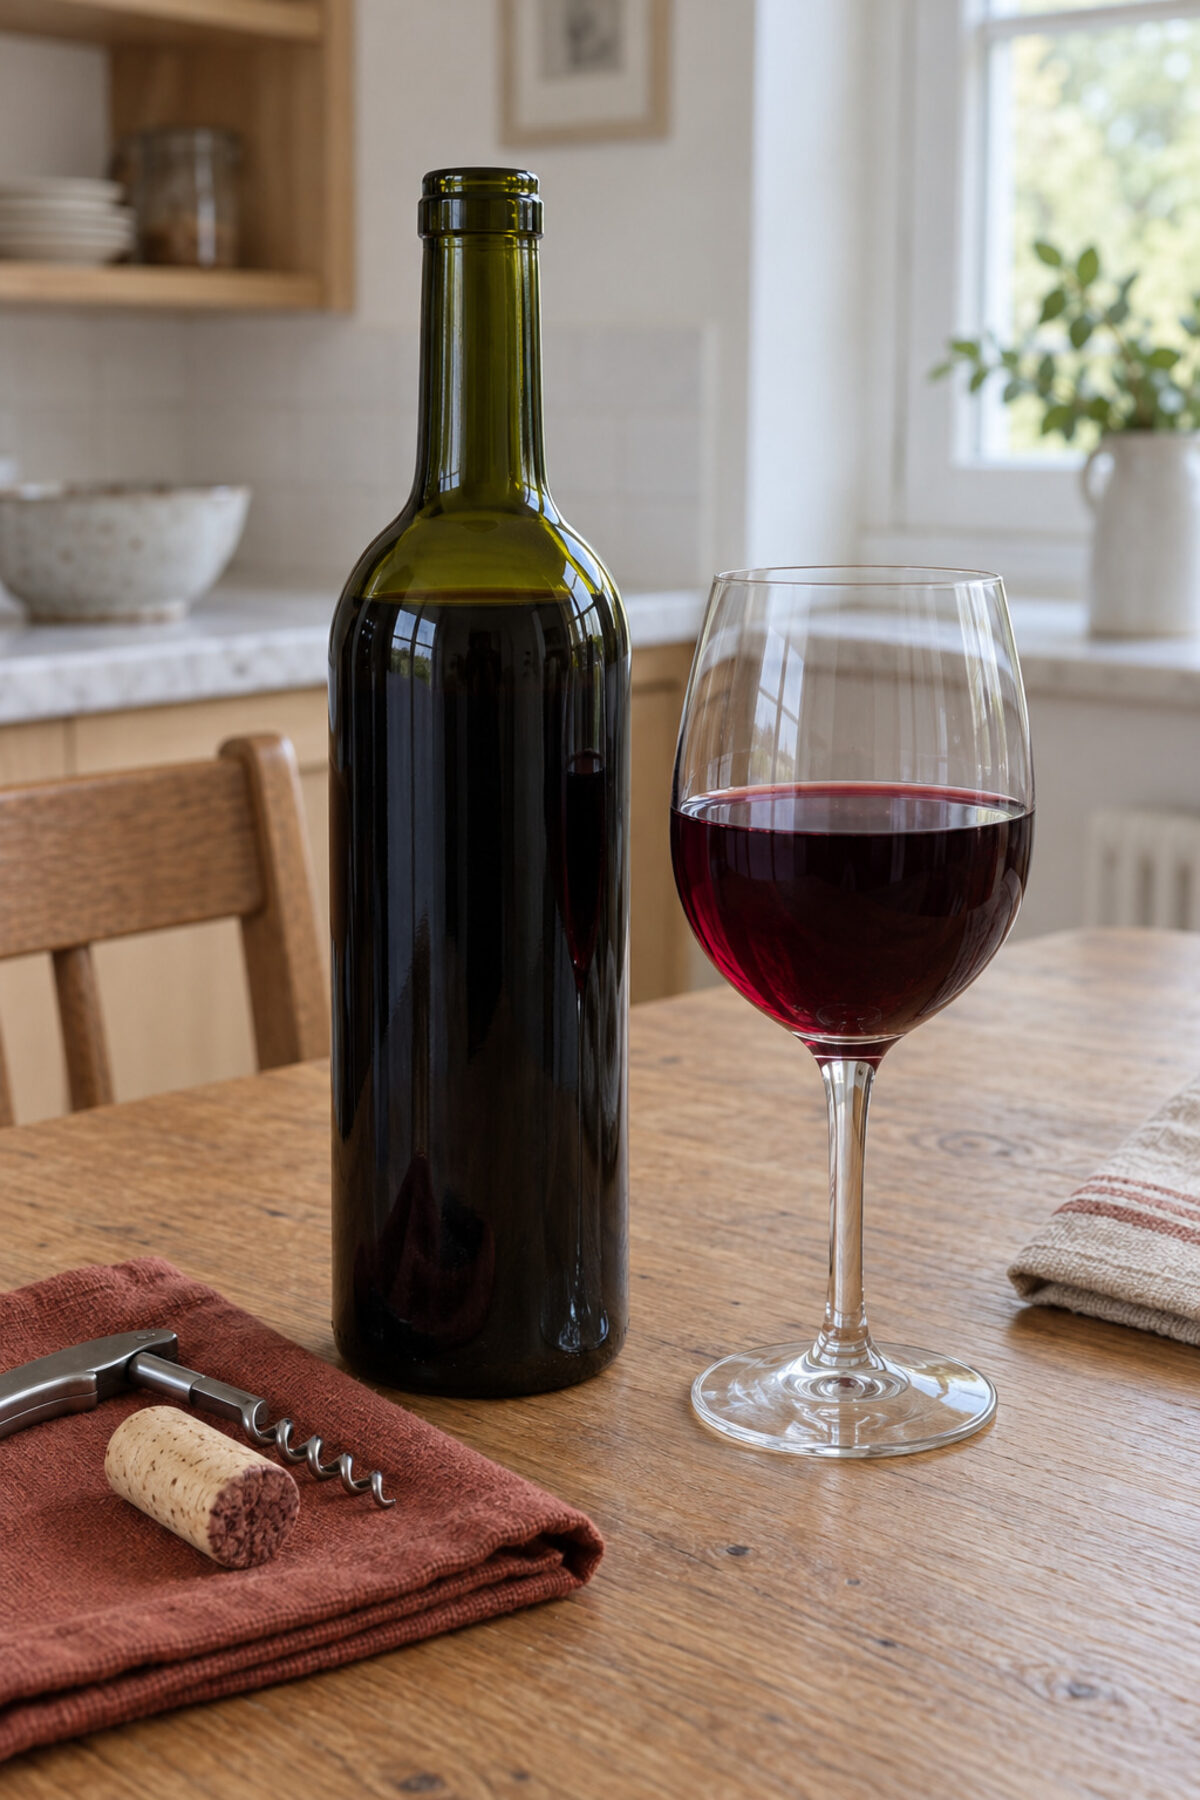
Black elderberries, without a single stem and boiled, with water, sugar and wine yeast. The must's acidity is corrected with a pH meter and the wine clears for months.
- Time
- 3–4weeks
- Temperature
- 65–80°F
- Jar
- 8L
The golden rule: always pasteurized juice, never windfall apples.
No sign-up. We guide you step by step, from the scale to the fridge.
Reviewed October 27, 2026 · 93 facts, each with its source
You'll need
- Wire cooling rack and a baking pan, for stripping the berries
- Stainless steel or enameled pot of 5 liters or more, with a lid, and a potato masher
- Food-grade plastic fermenting bucket, 8 liters, with a lid
- Nylon straining bag
- Two 5-liter glass jugs (carboys)
- Two airlocks: one for the bucket lid and one with a stopper for the jug
- Hydrometer and its test jar
- Digital pH meter, with pH 4 and pH 7 calibration solutions
- Siphon tube for racking
- Funnel
- Kitchen scale
- Thermometer
- Wine or beer sanitizer (metabisulfite or a no-rinse one)
- Clean wine bottles, with new corks or screw caps
Step by step
-
Pick black elder only, fully ripe
Black elder (Sambucus nigra) is a shrub or small tree, with a woody trunk and branches, and its clusters of black berries hang down. It ripens between August and September. Pick the clusters where every berry is ripe, a deep, rich color. Not everything ripens at once: come back in a few days. Allow about 2.2 kg of clusters to get 1.7 kg of berries. Pick them in the cool of the day and use them soon, because they spoil fast; if you can't that same day, refrigerate or freeze them.
Tip: Don't mistake it for dwarf elder (Sambucus ebulus), common on roadsides and field edges in Europe. Its berries are black too, but they're toxic and cause severe digestive upset. You can tell it apart because it's an herb, with no woody trunk or branches, and because its clusters point up. Don't use red elderberry (Sambucus racemosa) either: it may be more toxic, especially the seeds. If you have the slightest doubt about the plant, don't use it. A plant identification app isn't enough: ask a pharmacist or a botanist.
-
Strip the berries without leaving a single stem
If you have time, freeze the clusters first: they strip more easily. Set the rack over the pan and rub the clusters gently against it: the berries drop into the pan and the stems stay on top. Go over the berries by hand and remove everything that isn't a ripe berry: every bit of stem, every leaf and dried flower, and any green, red, shriveled, moldy or insect-damaged berries. Rinse them and weigh them: 1.7 kg of clean berries.
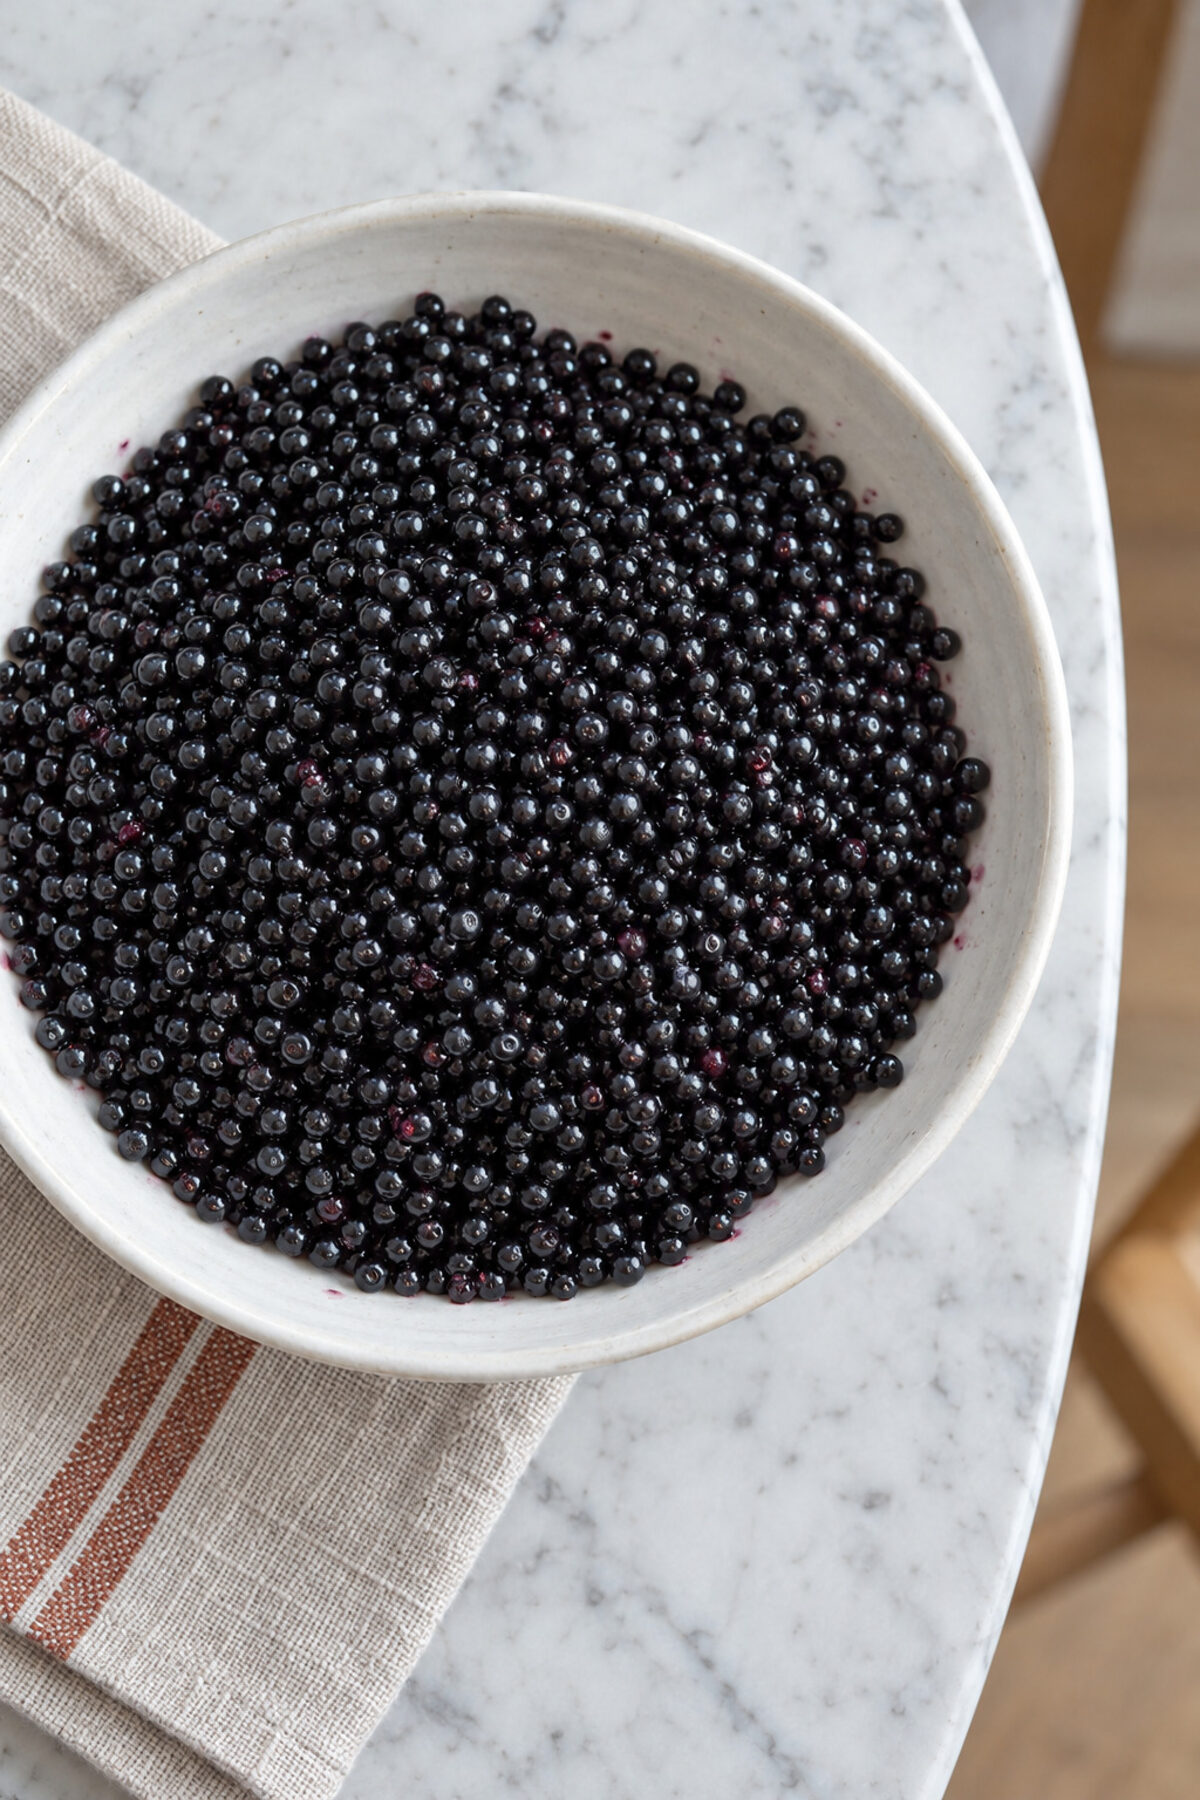 AI
Tip: Stems and leaves are the most toxic parts of the plant, and green berries hold more than ripe ones. In the California outbreak, whole clusters were pressed, leaves and branches included. This is the step that matters most in the whole recipe: take your time.
-
Wash and sanitize everything that touches the must
Wash your hands. Wash the bucket and its lid, the bag, the jugs, the airlocks, the funnel, the tube, the test jar, the pH meter's probe and the spoon in hot soapy water, and rinse everything in hot water. Then sanitize it with the sanitizer, as the maker directs. The bucket has to be food-grade plastic.
Tip: Do it again every time something is about to touch the wine: the hydrometer, the tube, the jugs. Cleanliness is what protects it from mold and vinegar.
-
Boil the berries for at least 10 minutes
Put the berries in the pot with 1.8 liters of the water. The pot should be stainless steel or enameled, never aluminum, iron or copper: the fruit is acidic. Bring it to a boil and keep it at a simmer, lid on, for at least 10 minutes, crushing the berries with the masher so they release their juice. Turn off the heat and dissolve 700 g of the sugar in the hot liquid. Add the rest of the water, 1.2 liters, cold. Cover the pot and let it cool to 80 °F or below, checked with the thermometer.
Tip: OSU says to always cook elderberries before eating them: raw, or as raw juice, they cause nausea and have put people in the hospital. Boiling stops the enzyme that releases hydrocyanic acid and lowers the glycosides, but doesn't destroy them all; that's why the rule on stems and green berries still stands. The 10 minutes come from OSU's elderberry vinegar recipe; OSU gives no time for simply cooking them. If you buy the elderberries frozen and imported, this boil also covers the 1 minute that the FSAI, Ireland's food safety authority, asks for imported frozen berries because of hepatitis A and norovirus outbreaks. Don't taste the berries or the juice before they're boiled.
-
Bring the sugar to 1.080 and the pH to 3.7 or lower
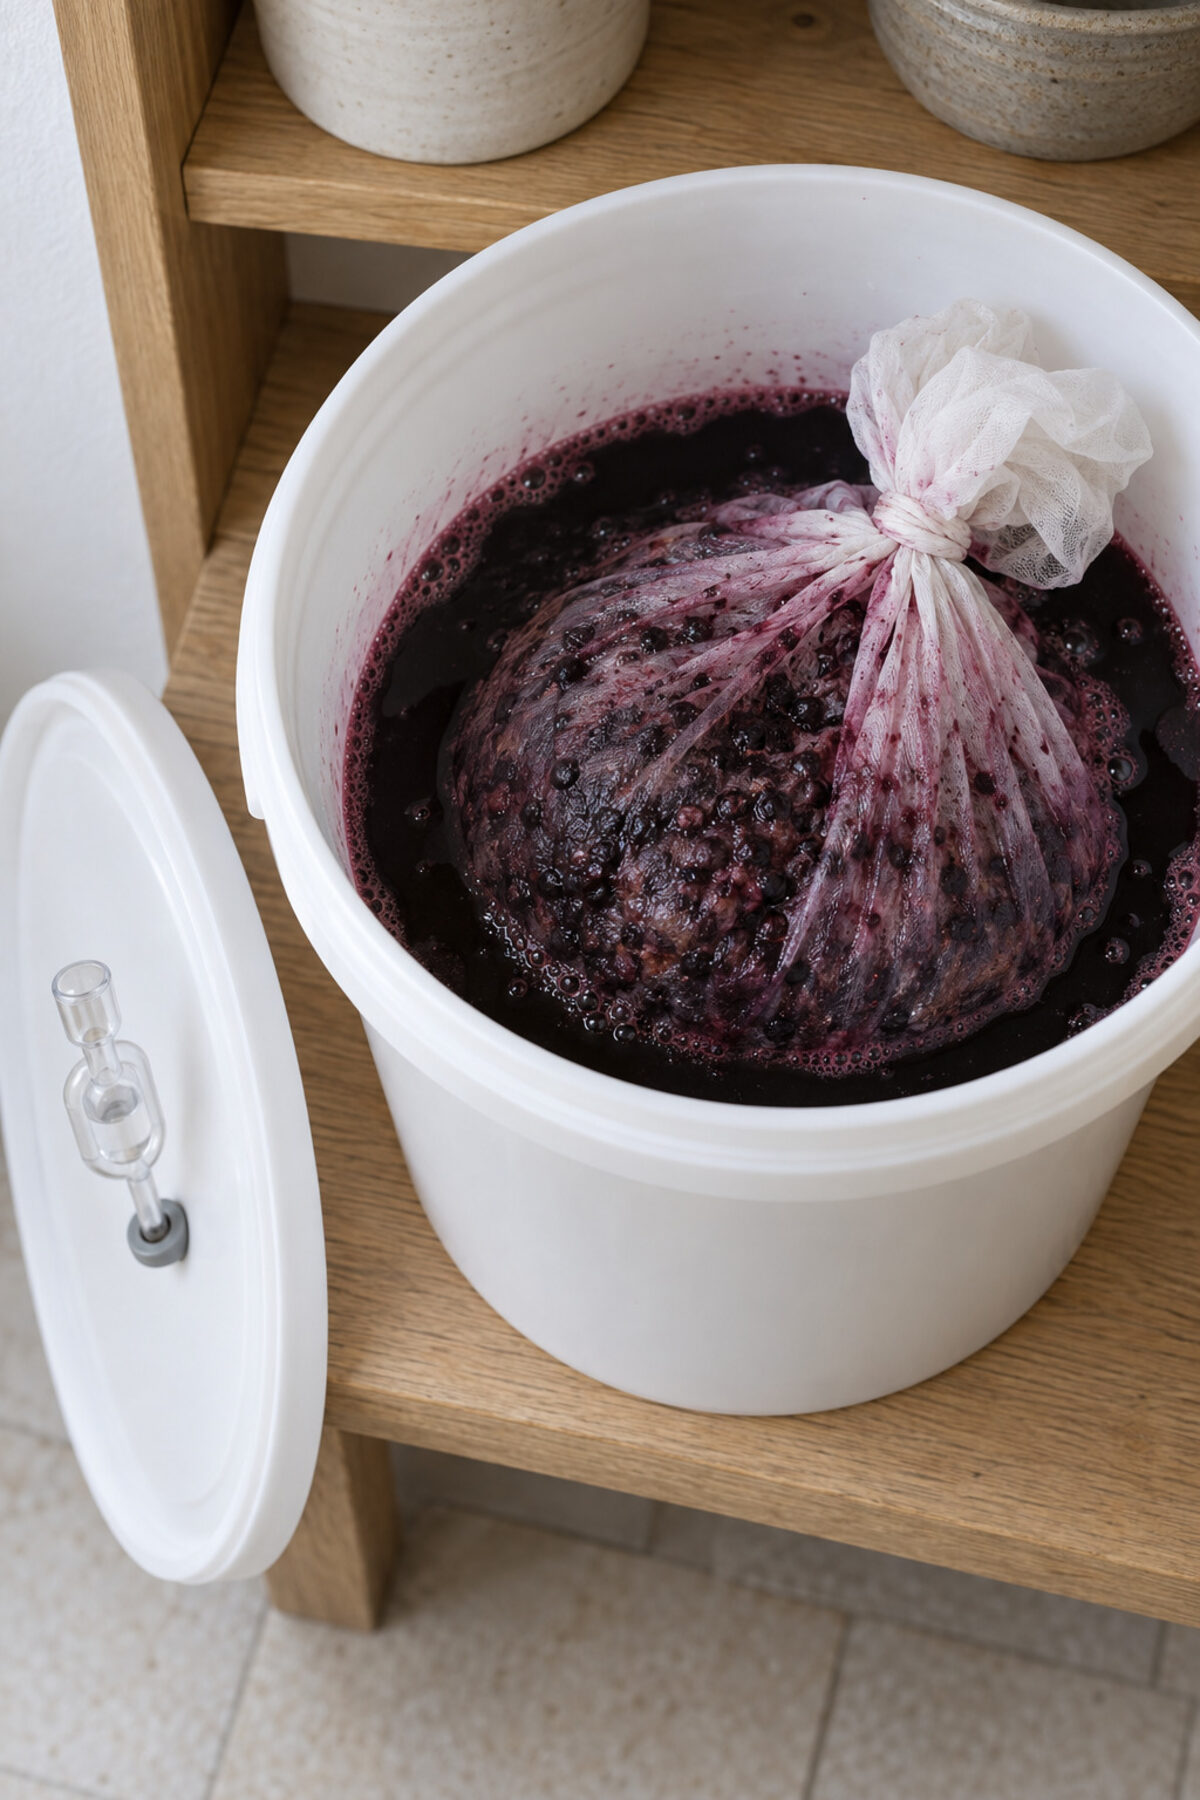
Put the open straining bag in the bucket and pour in the berries with all their liquid. Tie the bag closed.
The sugar. Draw a sample with the tube, read the gravity with the hydrometer and throw the sample out. It should read 1.080. If it's lower, dissolve a little of the remaining sugar in a glass of the must, add it, stir and read again, until you reach 1.080 (our house rule: it's NDSU's minimum for a wine must). You don't have to use all the sugar, and don't overshoot. Write the reading down.
The acidity. Calibrate the pH meter with its pH 4 and pH 7 solutions. Dissolve 5 g of the acid blend in a little must, add it, stir and measure the pH of a sample. It has to end up at 3.7 or lower. If it reads higher, add 1 g of acid blend at a time, stir and measure again. If it already read 3.3 or lower without acid, don't add any. Write the reading down.
Add 5 g of nutrient and the pectic enzyme, at the maker's dose (about 4 g), and stir. Put on the lid with its airlock.
Tip: Black elderberries can be above pH 4.6: it's a low-acid fruit. Wine usually sits at pH 3.3–3.7, and that acidity is what holds back most microbes. Not adding the yeast until it reads 3.7 or lower is our house rule. NDSU adds a Campden tablet when the juice comes from fresh fruit, to deal with wild yeast and bacteria; here the elderberries are boiled, so the recipe leaves it out. Pectic enzyme breaks down the pectin the fruit releases when it's cooked, and keeps the wine from turning hazy.
-
Add the yeast
Rehydrate the yeast as the packet says and pour it into the bucket. Put the lid back on with its airlock, filled with water to the line.
Tip: Use wine yeast, never baking yeast; NDSU uses strains such as EC-1118 or K1-V1116.
-
Let it ferment at 65–80 °F and check the gravity
Keep it somewhere at 65–80 °F, without sudden temperature swings. Within a few days you'll see bubbles and the airlock will release gas: the yeast is eating the sugar.
After 3 to 5 days, draw a sample with the sanitized tube, read the gravity and throw the sample out. After that, check it every few days. If the bag floats, push it under with a sanitized spoon and close the lid again right away: keep fruit flies out, they carry vinegar bacteria. Plan on 3 to 4 weeks, but don't go by the date: the gravity decides.
Tip: If it smells of rotten eggs, the yeast is short of nutrients. That alone is no reason to throw it out.
-
Take the fruit out at 1.020–1.030 and move it to the jug
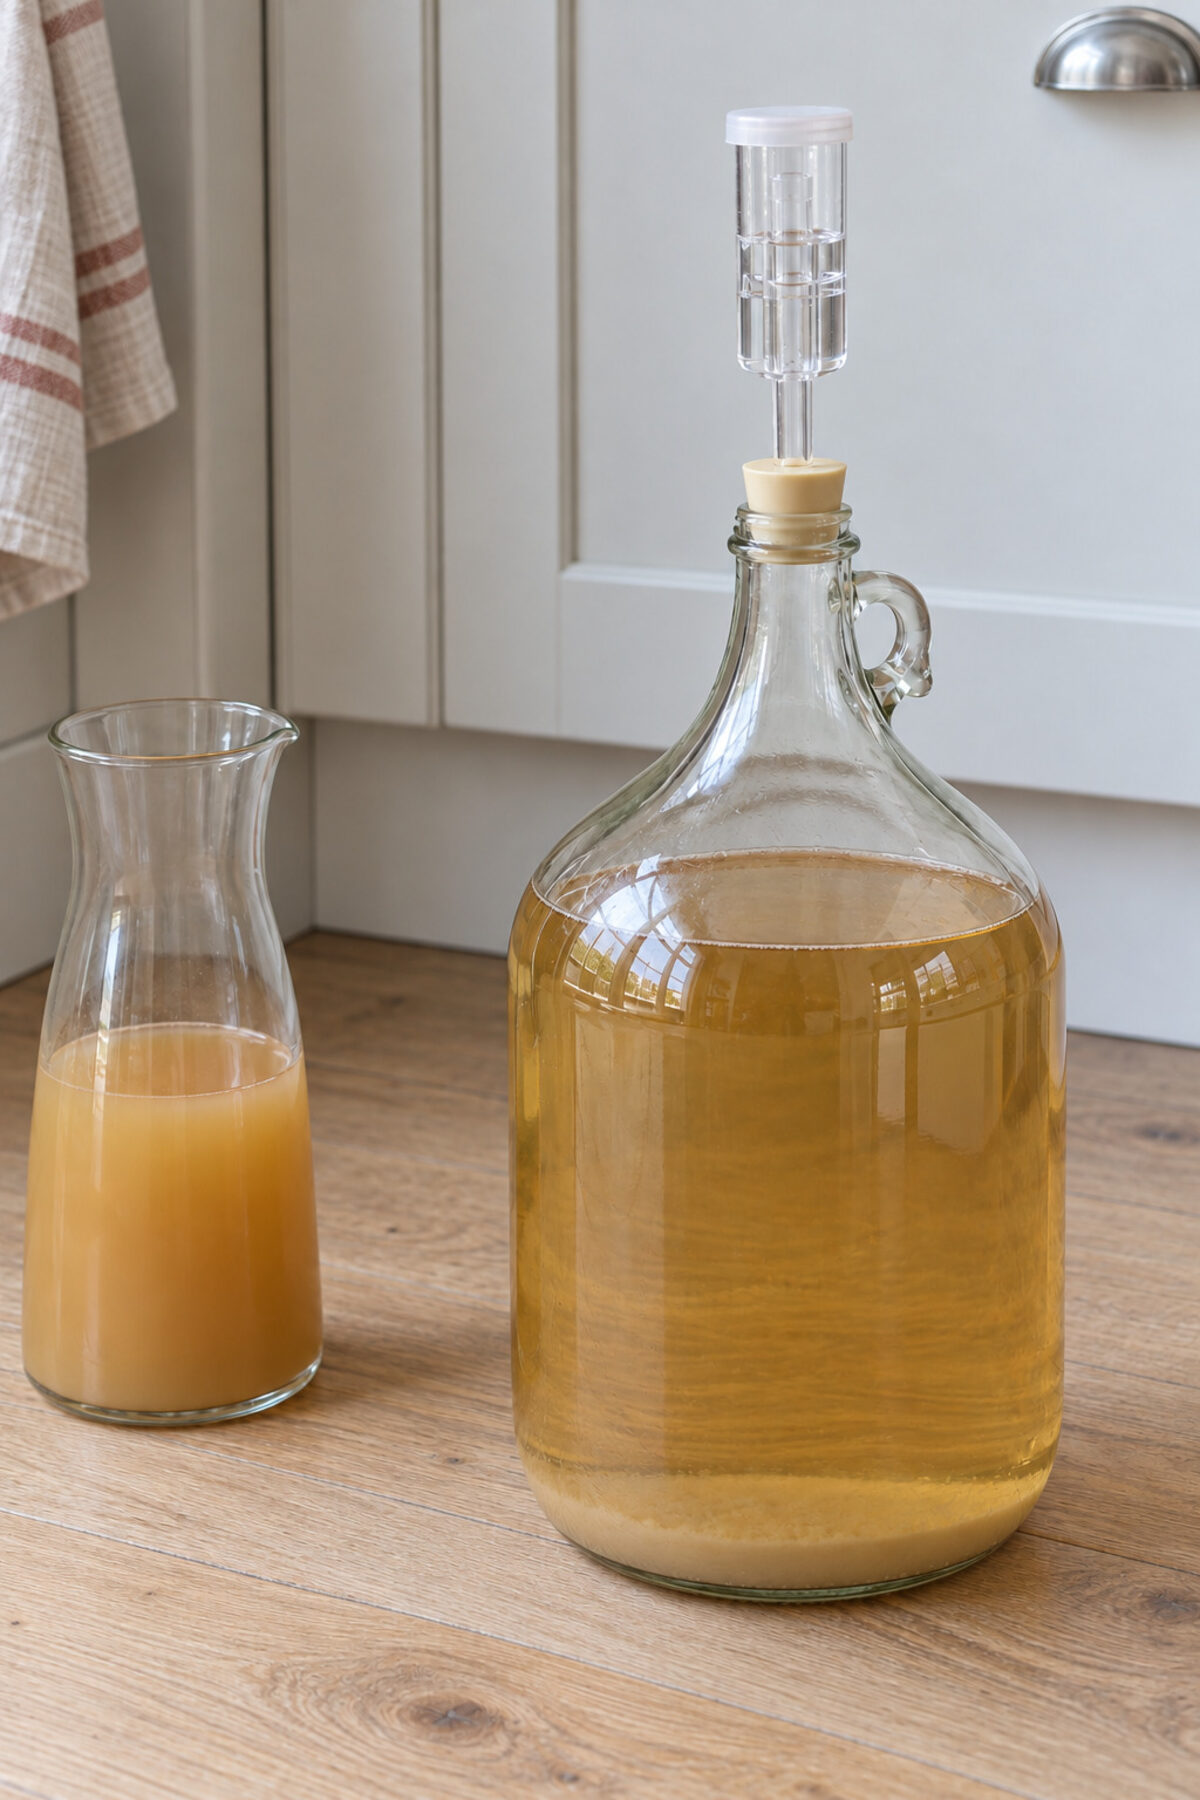
When the gravity drops to 1.020–1.030, take out the bag and squeeze it well over the bucket with clean hands. Throw the fruit away. Siphon the liquid into a clean, sanitized jug and leave the sediment at the bottom of the bucket behind. Don't fill it above the shoulders: it's still fermenting and needs room. Fit the stopper with its airlock.
Tip: Elderberries stain hands and clothes: kitchen gloves help. Set the bucket higher than the jug and let the liquid run down the side, without splashing.
-
When it's done, top it up and let it clear
It's done when you no longer see bubbles and the gravity reads 0.998 or lower and doesn't change over three readings across 7 days (our house rule). Dry wine can drop as low as 0.990. It normally ends below 1.000, because alcohol is lighter than water. If it holds still at exactly 1.000 and tastes sweet, it has sugar left: treat it as if it had stopped above.
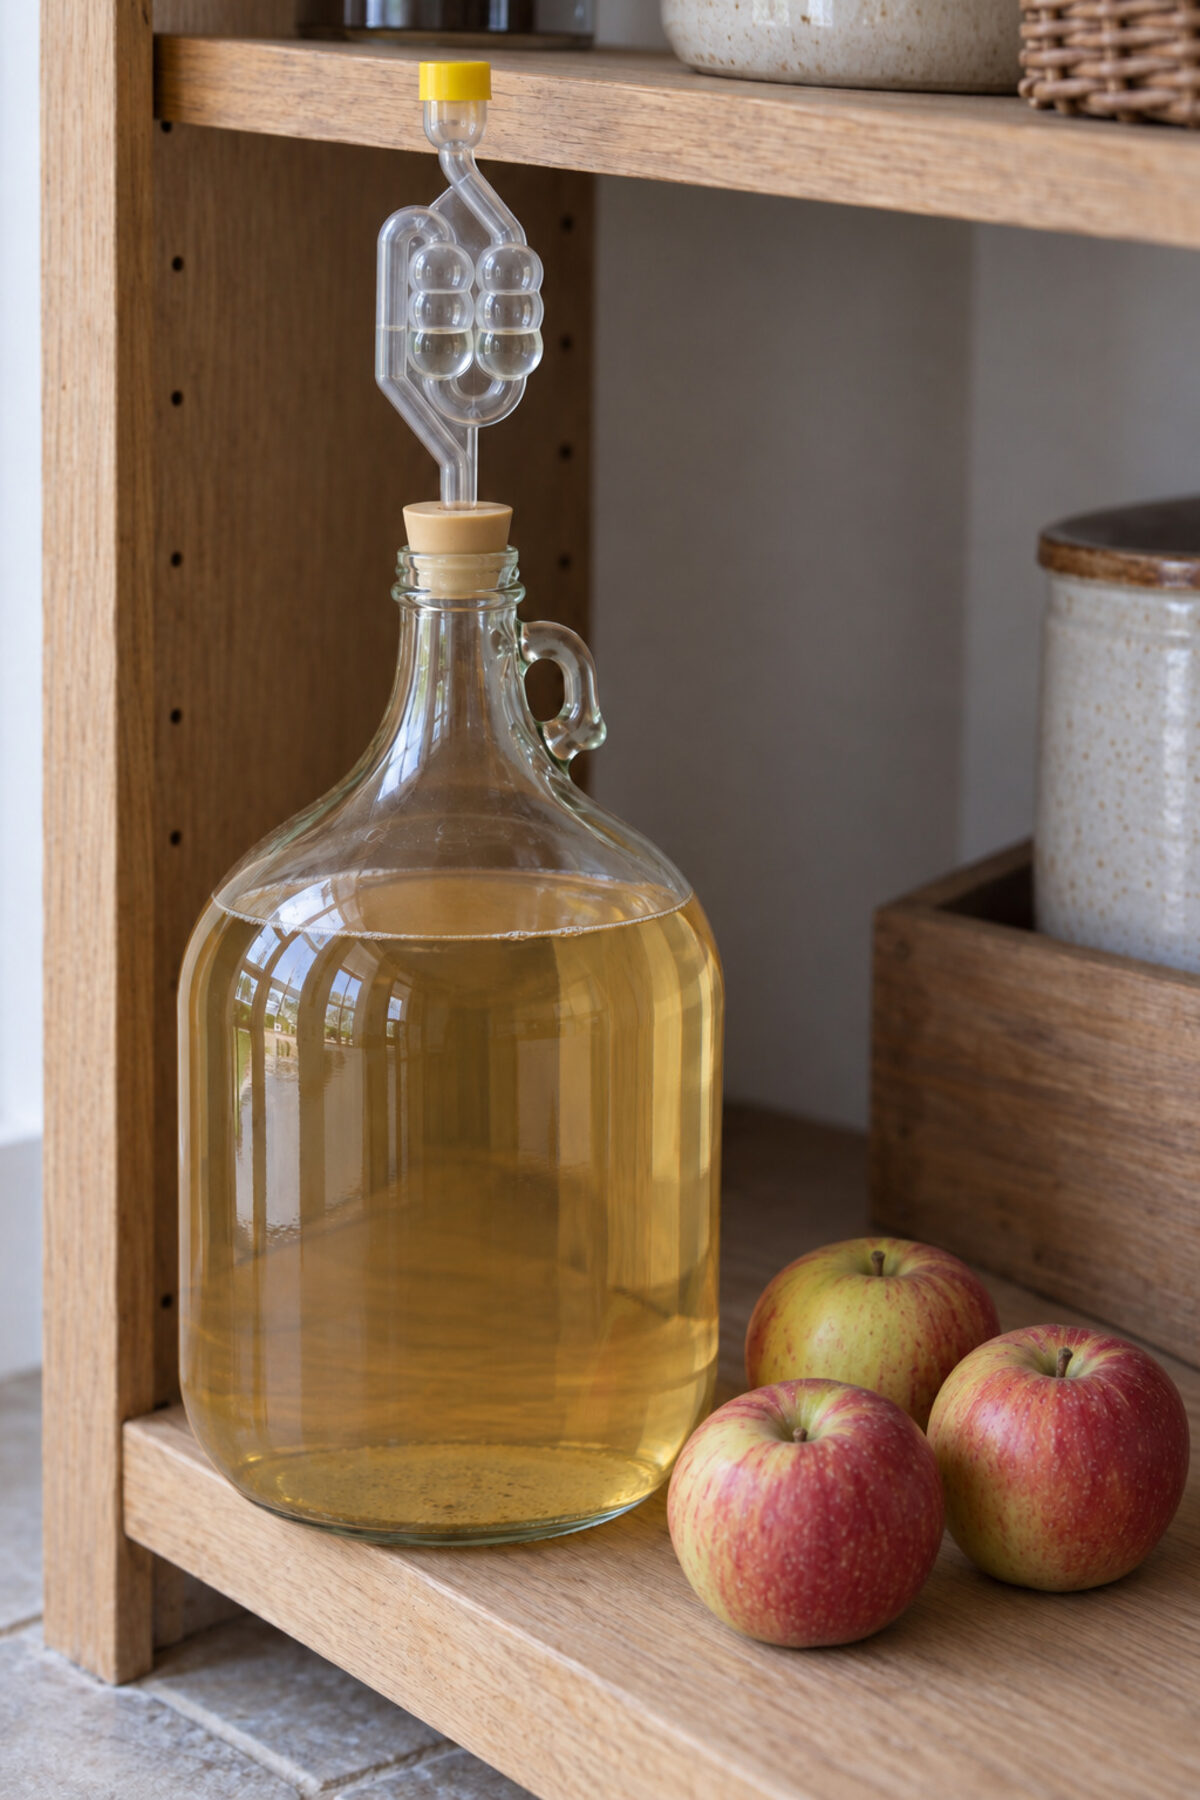
Then top up the jug to a few inches below the airlock, with water or sanitized marbles, so little air touches it. Let it clear. Every few weeks, rack it into the other jug, clean and sanitized, to leave the sediment behind, and top it up again. It can take weeks or months.
Tip: If it stops above 0.998, there may be sugar left. Don't bottle it like that: it can start fermenting again in the bottle and burst it. To bottle it sweet you have to stabilize it with potassium sorbate, and sorbate alone won't stop a fermentation that is still going.
-
Bottle it once it's clear and stable
Bottle it when it's clear, with no sediment left to rack off and the gravity stable at 0.998 or lower. Wash the bottles inside with a brush and dish soap and rinse them. Just before filling, run the no-rinse sanitizer through them and let them drain. Fill them with the siphon tube, without drawing up the sediment, and close them with new corks or screw caps.
Tip: It's a still wine: ordinary wine bottles. Don't clean the bottles with bleach or with antibacterial soaps containing triclosan. With corks, stand the bottles upright for a few days so the cork can expand.
-
Age it at least 2 months
Store the bottles on their sides somewhere cool and dark. Wait at least 2 months before opening it, and a year is better. Meanwhile, keep an eye on them: a cork that pushes out, or gas in a bottle that shouldn't have any, means it's fermenting inside. Move that bottle to the fridge and open it carefully, pointed away from your face.
Tip: Write on each bottle the date, where the elderberries came from, and the starting and final gravity.
No sign-up. We guide you step by step, from the scale to the fridge.
Variations
The same method, a different flavor. Once you have this one down, try one of these.
What you'll see
Ripe black elderberries are edible, and their juice can be fermented into wine. But elder asks for more care than any other fruit: its leaves, stems, flowers and bark, and its green berries, contain cyanogenic glycosides, which release cyanide when digested. In 1983, in California, eight people ended up in the hospital after drinking juice from wild elderberries pressed with their leaves and branches: the more they had drunk, the sicker they were. That's why this recipe has three rules that aren't negotiable: black elder only, only ripe berries without a single stem, and always cooked.
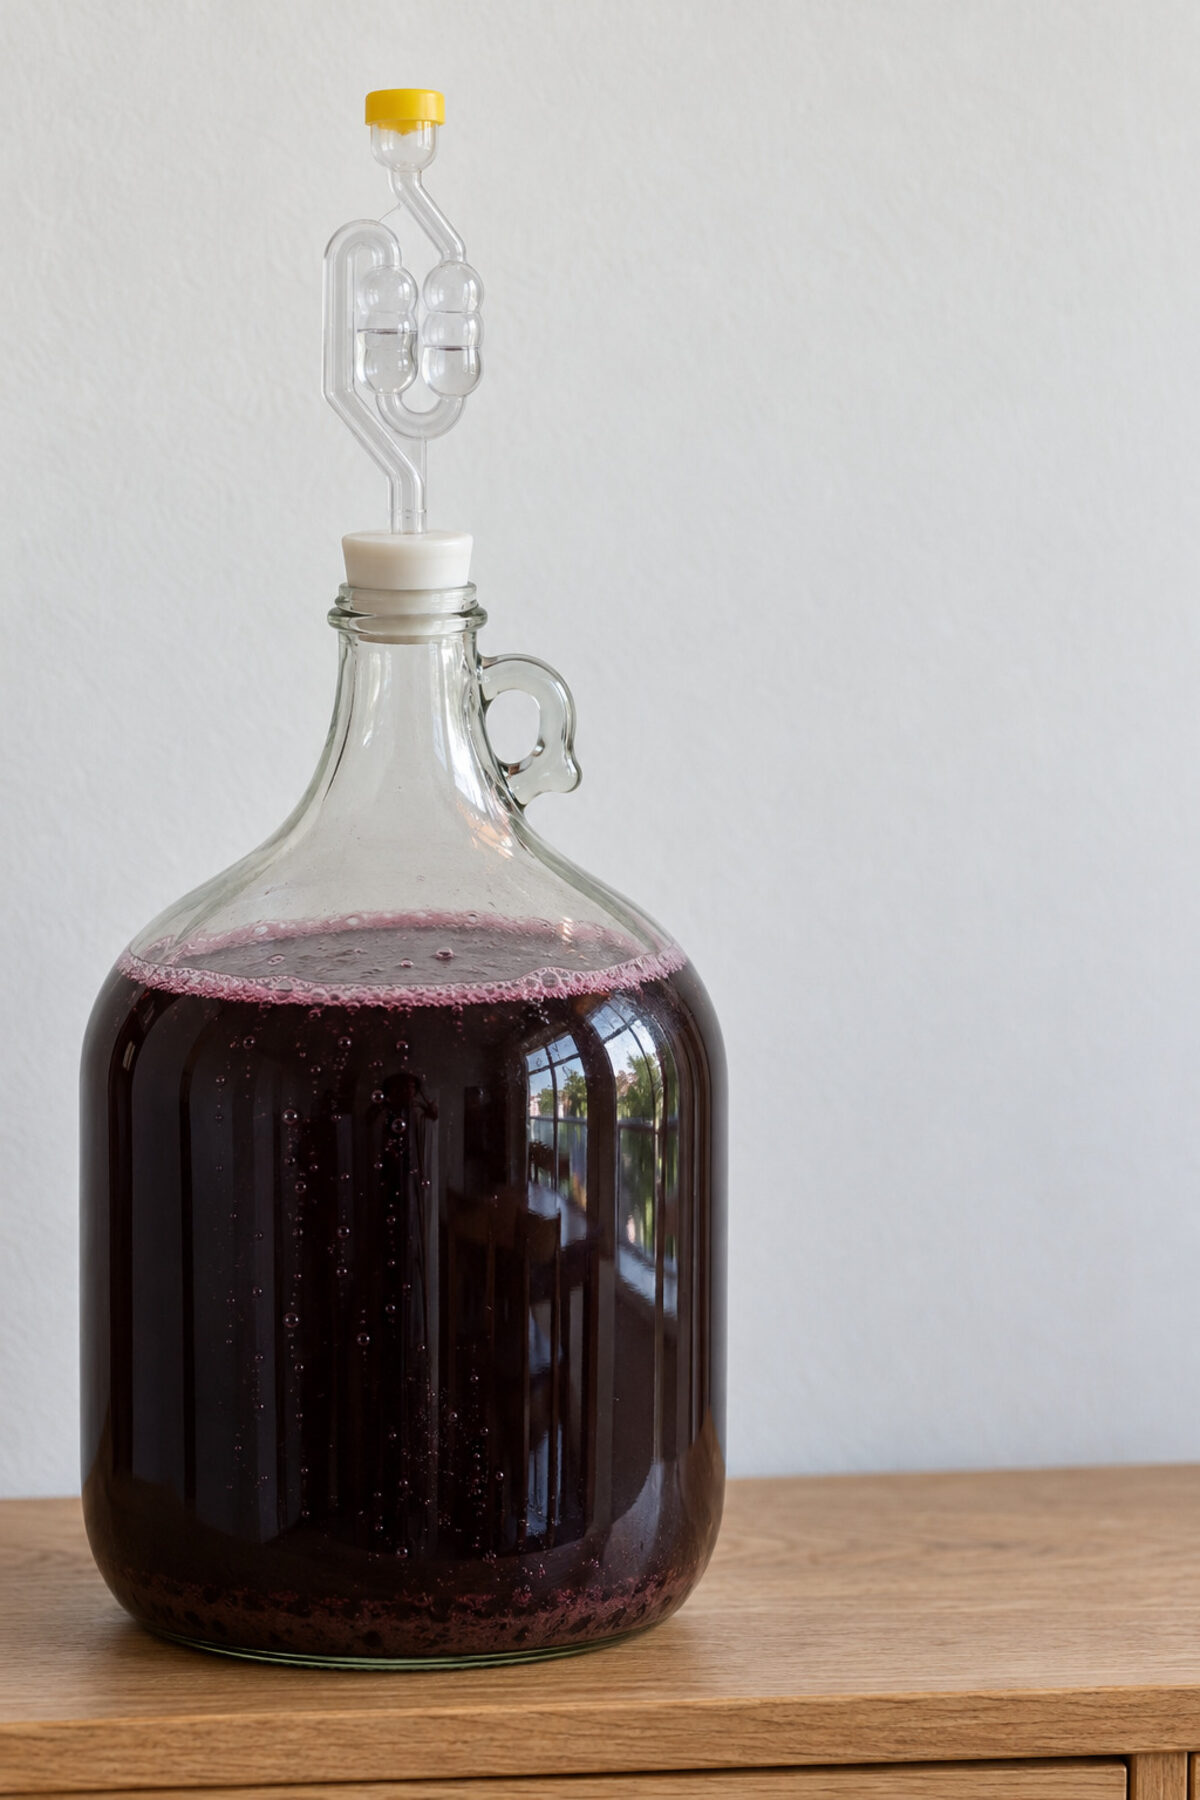
It's alcoholic, around 11% (an estimate from the gravity). It's made like a fruit wine: the fruit ferments for the first weeks in a straining bag inside a bucket, then the wine goes into a jug and clears for months. No food safety agency publishes an elderberry wine recipe, so the elderberry follows Oregon State University (OSU) Extension, the CDC and France's health agency (ANSES), and the wine follows North Dakota State University (NDSU) Extension's home winemaking guide, like the berry melomel and the hard cider.
 AI
 AI
AI
How to tell it's going well
- Black elder only (Sambucus nigra): a woody shrub or tree with hanging clusters. Never dwarf elder (Sambucus ebulus), an herb with no wood and upright clusters, with toxic berries, and never red elderberry. If you're unsure of the plant, don't use it; an app isn't enough.
- Only ripe, dark berries, without a single green or red one.
- Not one stem, leaf or flower. They're the most toxic parts of the plant: elderberry juice pressed with leaves and branches sent eight people to the hospital in California.
- Always cooked: bring to a boil and simmer at least 10 minutes, frozen berries too. Never taste raw berries or raw juice. Fermentation doesn't replace cooking: we haven't found any study that measures how much glycoside is left in the wine.
- The must at pH 3.7 or lower before the yeast, measured with a calibrated meter: elderberries can be low in acid.
- It's alcoholic, around 11%. Not for anyone under the legal drinking age, or if you are or may be pregnant.
- Sanitize everything that touches the must, every time, and use a food-grade plastic bucket. Keep fruit flies out: they carry vinegar bacteria.
- Bottle it dry and stable: at 0.998 or lower and unchanged over 7 days (our house rule). With sugar and live yeast, bottles can burst. If you want it sweet, stabilize it first with potassium sorbate.
- Mold on the surface or on the fruit: throw it all out.
- For your own use, never for sale. In the US, adults may make wine and beer at home for personal or family use, but may not sell it. In the UK, what you make only for your own use pays no duty as long as it isn't a spirit. Elsewhere, check your country's rules.
- Never distill it. Distilling at home is prohibited in the US, and Fervida doesn't teach it.
Where every number comes from
Every number in this recipe comes from a food safety guide. We keep a copy of each source and quote its exact words.
-
1
Elderberry juice can be fermented into wine
“berry juice can be fermented into wine”
CDC, MMWR · Poisoning from Elderberry Juice -- California (1984) · read on October 25, 2026
-
2
Ripe berries are juicy and edible
“The berries are juicy and edible when mature.”
CDC, MMWR · Poisoning from Elderberry Juice -- California (1984) · read on October 25, 2026
-
3
Leaves, flowers, bark, buds and roots hold a glucoside that can yield hydrocyanic acid
“The fresh leaves, flowers, bark, young buds, and roots contain a bitter alkaloid and also a glucoside that, under certain conditions, can produce hydrocyanic acid.”
CDC, MMWR · Poisoning from Elderberry Juice -- California (1984) · read on October 25, 2026
-
4
In the California outbreak, the berries were pressed with leaves and branches
“Bunches of berries were crushed with their leaves and branches in a stainless-steel press.”
CDC, MMWR · Poisoning from Elderberry Juice -- California (1984) · read on October 25, 2026
-
5
The more juice each person drank, the sicker they were
“Severity of illness correlated with the amount of elderberry juice consumed”
CDC, MMWR · Poisoning from Elderberry Juice -- California (1984) · read on October 25, 2026
-
6
No leaves or stems in the juice
“leaves and stems should not be crushed in when making juice”
CDC, MMWR · Poisoning from Elderberry Juice -- California (1984) · read on October 25, 2026
-
7
Better cooked; raw berries can cause nausea
“particularly if cooked (uncooked berries may produce nausea)”
CDC, MMWR · Poisoning from Elderberry Juice -- California (1984) · read on October 25, 2026
-
8
Many elderberry varieties contain cyanogenic glycosides
“Researchers have found that many varieties of elderberries contain toxic compounds called cyanogenic glycosides.”
Oregon State University Extension Service · Play it safe when preserving elderberries (EM 9446) · read on October 27, 2026
Show the remaining 85 claims
-
9
When digested, they release cyanide
“During digestion, these compounds release cyanide, which goes into the bloodstream and prevents proper oxygen utilization.”
Oregon State University Extension Service · Play it safe when preserving elderberries (EM 9446) · read on October 27, 2026
-
10
Raw berries or raw juice cause nausea and have put people in the hospital
“Eating raw elderberries or drinking raw elderberry juice can cause nausea, and in some instances has led to serious illness and hospitalization.”
Oregon State University Extension Service · Play it safe when preserving elderberries (EM 9446) · read on October 27, 2026
-
11
Always cook elderberries before eating them
“Because raw elderberry products may contain elevated levels of toxic compounds, you should always cook elderberries before eating them.”
Oregon State University Extension Service · Play it safe when preserving elderberries (EM 9446) · read on October 27, 2026
-
12
Freeze or dry them raw if you like, but cook them before eating
“Elderberries can safely be frozen and dried raw but must be cooked before being consumed to prevent risk of cyanide poisoning.”
Oregon State University Extension Service · Play it safe when preserving elderberries (EM 9446) · read on October 27, 2026
-
13
The European black elder is a small tree
“The European black elder is a small tree up to 20 feet high.”
Oregon State University Extension Service · Play it safe when preserving elderberries (EM 9446) · read on October 27, 2026
-
14
Red elderberry may be more toxic, especially the seeds: don't use it
“they may have a higher toxin concentration, particularly in the seeds. Because of their higher toxicity, food preservers should avoid using these to create food products.”
Oregon State University Extension Service · Play it safe when preserving elderberries (EM 9446) · read on October 27, 2026
-
15
Pick them fully ripe, a deep, rich color
“Harvest elderberries when the fruits are fully ripe. Ripe berries have a deep, rich color”
Oregon State University Extension Service · Play it safe when preserving elderberries (EM 9446) · read on October 27, 2026
-
16
They don't all ripen at once: pick more than once
“Not all berries on the plant will ripen at the same time, so you may have to harvest multiple times.”
Oregon State University Extension Service · Play it safe when preserving elderberries (EM 9446) · read on October 27, 2026
-
17
They spoil fast: pick in the cool of the day and use them soon
“Elderberries spoil quickly. Harvest them during the cooler part of the day and process the fruit as soon as possible.”
Oregon State University Extension Service · Play it safe when preserving elderberries (EM 9446) · read on October 27, 2026
-
18
If not used right away, refrigerate at 35–40 °F or freeze
“Refrigerate berries at 35–40ºF for short-term storage or freeze them if you cannot process your harvest immediately.”
Oregon State University Extension Service · Play it safe when preserving elderberries (EM 9446) · read on October 27, 2026
-
19
Stems and leaves hold more toxins: remove them first
“Stems and leaves contain higher levels of toxins, so it is important to remove these before processing.”
Oregon State University Extension Service · Play it safe when preserving elderberries (EM 9446) · read on October 27, 2026
-
20
Strip them by rubbing the clusters over a rack
“Place a wire cooling rack over a baking pan and gently rub the berries over the rack.”
Oregon State University Extension Service · Play it safe when preserving elderberries (EM 9446) · read on October 27, 2026
-
21
Frozen, they strip more easily
“It can help to freeze the berries before screening.”
Oregon State University Extension Service · Play it safe when preserving elderberries (EM 9446) · read on October 27, 2026
-
22
Bring to a boil and simmer at least 10 minutes
“Bring to a boil and simmer for at least 10 minutes.”
Oregon State University Extension Service · Play it safe when preserving elderberries (EM 9446) · read on October 27, 2026
-
23
A heavy-bottomed stainless steel pan
“Combine ingredients in a heavy-bottom stainless steel pan.”
Oregon State University Extension Service · Play it safe when preserving elderberries (EM 9446) · read on October 27, 2026
-
24
European and American elderberries can be above pH 4.6
“American and European elderberries can be low in acid (with a pH greater than 4.6)”
Oregon State University Extension Service · Play it safe when preserving elderberries (EM 9446) · read on October 27, 2026
-
25
Imported frozen berries, boiled for 1 minute
“As a result of outbreaks of norovirus and hepatitis A virus in imported frozen berries across Europe in recent years, the FSAI recommends boiling imported frozen berries for one minute before consumption.”
Food Safety Authority of Ireland (FSAI) · Advice to boil imported frozen berries · read on October 26, 2026
-
26
Leave out green berries and stems when making juice
“it is nevertheless advisable to carefully exclude green elderberries and stems during juice preparation”
Molecules (MDPI), via PubMed Central · Cyanogenic Glycoside Analysis in American Elderberry (Appenteng et al., 2021) · read on October 27, 2026
-
27
Leaves hold far more glycoside than flowers, and flowers more than berries
“reported highest amounts of sambunigrin in elder leaves (27.68–209.61 µg/g FW), lower amounts in flowers (1.23–18.88 µg/g FW) and lowest amounts in berries (0.08–0.77 µg/g FW)”
Molecules (MDPI), via PubMed Central · Cyanogenic Glycoside Analysis in American Elderberry (Appenteng et al., 2021) · read on October 27, 2026
-
28
Boiling stops the enzyme that releases hydrocyanic acid, but doesn't destroy all the glycoside
“Boiling can inhibit the activity of endogenous β-glucosidase due to high temperatures and halt the production of HCN [39]. However, this is only partially effective in reducing HCN because some CNGs are relatively heat stable”
Molecules (MDPI), via PubMed Central · Cyanogenic Glycoside Analysis in American Elderberry (Appenteng et al., 2021) · read on October 27, 2026
-
29
Heat cut the glycosides in elderberry juice by 44%
“higher processing temperatures decreased the levels of cyanogenic glycosides by 44% in elderberry juice”
Molecules (MDPI), via PubMed Central · Cyanogenic Glycoside Analysis in American Elderberry (Appenteng et al., 2021) · read on October 27, 2026
-
30
Dwarf elder (Sambucus ebulus) berries are toxic and cause severe digestive upset
“les baies de sureau hièble ou yèble (Sambucus ebulus) sont toxiques et peuvent être responsables de troubles digestifs sévères”
ANSES · Cet été, à quelles plantes faire attention pour éviter les intoxications ? · read on October 27, 2026
-
31
Dwarf elder fruit points up; black elder fruit hangs down
“les dangereux fruits du sureau hièble sont dressés vers le haut, tandis que ceux du sureau noir sont pendants”
ANSES · Cet été, à quelles plantes faire attention pour éviter les intoxications ? · read on October 27, 2026
-
32
Dwarf elder is an herb with no wood
“contrairement au sureau noir, le sureau hièble est une plante herbacée et ne fait donc pas de bois”
ANSES · Cet été, à quelles plantes faire attention pour éviter les intoxications ? · read on October 27, 2026
-
33
Raw, ripe berries are laxative
“Les fruits mûrs sont laxatifs consommés crus.”
ANSES · Cet été, à quelles plantes faire attention pour éviter les intoxications ? · read on October 27, 2026
-
34
They ripen between August and September
“parviennent à maturité entre août et septembre”
ANSES · Cet été, à quelles plantes faire attention pour éviter les intoxications ? · read on October 27, 2026
-
35
If you're unsure what the plant is, don't eat it
“Ne pas consommer la plante ramassée en cas de doute sur son identification”
ANSES · Cet été, à quelles plantes faire attention pour éviter les intoxications ? · read on October 27, 2026
-
36
A plant identification app isn't enough
“elles ne doivent pas être l’unique moyen d’identification”
ANSES · Cet été, à quelles plantes faire attention pour éviter les intoxications ? · read on October 27, 2026
-
37
Many recipes use 3 to 5 pounds of fruit per gallon
“Many recipes call for 3 to 5 pounds of fruit per gallon of wine, with added water making up the rest of the volume.”
NDSU Extension (North Dakota State University) · From the Garden or Orchard to the Table: Getting Started With Home Winemaking (FN1638, reviewed August 2026) · read on October 25, 2026
-
38
Sound fruit, not overripe, free of disease, blemishes and insects
“Be sure to choose high-quality fruit that is not overripe. The fruit should be free from diseases, blemishes and insect damage.”
NDSU Extension (North Dakota State University) · From the Garden or Orchard to the Table: Getting Started With Home Winemaking (FN1638, reviewed August 2026) · read on October 25, 2026
-
39
No stems or leaves, washed, damaged fruit sorted out
“Pull off stems and leaves, wash and sort out damaged fruit.”
NDSU Extension (North Dakota State University) · From the Garden or Orchard to the Table: Getting Started With Home Winemaking (FN1638, reviewed August 2026) · read on October 25, 2026
-
40
Heating fruit releases too much pectin
“Avoid heating fruit because the heat may cause too much pectin to be released.”
NDSU Extension (North Dakota State University) · From the Garden or Orchard to the Table: Getting Started With Home Winemaking (FN1638, reviewed August 2026) · read on October 25, 2026
-
41
Pectic enzyme keeps it from turning hazy
“This chemical helps break down pectin and prevents “pectic haze,” or cloudiness, in the resulting wine.”
NDSU Extension (North Dakota State University) · From the Garden or Orchard to the Table: Getting Started With Home Winemaking (FN1638, reviewed August 2026) · read on October 25, 2026
-
42
A teaspoon of pectic enzyme per gallon
“Pectic enzyme 1 tsp.”
NDSU Extension (North Dakota State University) · From the Garden or Orchard to the Table: Getting Started With Home Winemaking (FN1638, reviewed August 2026) · read on October 25, 2026
-
43
Wine usually sits at pH 3.3 to 3.7, which holds back most microbes
“Most wine is fairly acidic, with a pH (acidity level) from 3.3 to 3.7; this helps prevent the growth of most types of microorganisms.”
NDSU Extension (North Dakota State University) · From the Garden or Orchard to the Table: Getting Started With Home Winemaking (FN1638, reviewed August 2026) · read on October 25, 2026
-
44
Acid blend is malic, tartaric and citric acid
“Acid blend is a mixture of malic, tartaric and citric acid.”
NDSU Extension (North Dakota State University) · From the Garden or Orchard to the Table: Getting Started With Home Winemaking (FN1638, reviewed August 2026) · read on October 25, 2026
-
45
You will most likely need to adjust the must with acid blend
“Most likely you will need to make adjustments to the must by adding various amounts of acid blend.”
NDSU Extension (North Dakota State University) · From the Garden or Orchard to the Table: Getting Started With Home Winemaking (FN1638, reviewed August 2026) · read on October 25, 2026
-
46
A teaspoon of acid blend per gallon
“Acid blend 1 tsp.”
NDSU Extension (North Dakota State University) · From the Garden or Orchard to the Table: Getting Started With Home Winemaking (FN1638, reviewed August 2026) · read on October 25, 2026
-
47
1 to 2 teaspoons of nutrient per gallon
“Yeast nutrient 1 to 2 tsp.”
NDSU Extension (North Dakota State University) · From the Garden or Orchard to the Table: Getting Started With Home Winemaking (FN1638, reviewed August 2026) · read on October 25, 2026
-
48
Without nutrient, stressed yeast smells of rotten eggs
“lack of yeast nutrient can stress the yeast, causing your wine to develop an unpleasant (hydrogen sulfide or rotten egg) odor”
NDSU Extension (North Dakota State University) · From the Garden or Orchard to the Table: Getting Started With Home Winemaking (FN1638, reviewed August 2026) · read on October 25, 2026
-
49
The Campden tablet is for juice from fresh fruit
“If the juice has been prepared from fresh fruit, plan to add potassium metabisulfite at the rate of 50 parts per million of SO2 (or one Campden tablet per gallon) to neutralize any wild yeast or bacteria.”
NDSU Extension (North Dakota State University) · From the Garden or Orchard to the Table: Getting Started With Home Winemaking (FN1638, reviewed August 2026) · read on October 25, 2026
-
50
Everything that touches the must is washed, rinsed and sanitized
“Everything that touches the juice or wine, including the primary fermenter, measuring containers and stirring spoons, must be washed, rinsed and sanitized.”
NDSU Extension (North Dakota State University) · From the Garden or Orchard to the Table: Getting Started With Home Winemaking (FN1638, reviewed August 2026) · read on October 25, 2026
-
51
Hot soapy water, a rinse, and sanitizer as the maker directs
“Begin by washing the equipment that will come into contact with any of the wine ingredients with hot, soapy water, and then rinse thoroughly with hot water. Finally, sanitize with potassium metabisulfite (Campden tablets) or sodium metabisulfite prepared according to the manufacturer’s directions.”
NDSU Extension (North Dakota State University) · From the Garden or Orchard to the Table: Getting Started With Home Winemaking (FN1638, reviewed August 2026) · read on October 25, 2026
-
52
A food-grade plastic bucket as the primary fermenter
“Large food-grade plastic pail (6 to 8 gallons): used as a primary fermenter”
NDSU Extension (North Dakota State University) · From the Garden or Orchard to the Table: Getting Started With Home Winemaking (FN1638, reviewed August 2026) · read on October 25, 2026
-
53
The fermenter, made of food-grade material
“Many kinds of vessels can be used for primary fermenters, but they must be made of food-grade materials.”
NDSU Extension (North Dakota State University) · From the Garden or Orchard to the Table: Getting Started With Home Winemaking (FN1638, reviewed August 2026) · read on October 25, 2026
-
54
The fruit can ferment inside the straining bag
“Some recipes call for leaving the fruit in the bag during the fermenting process.”
NDSU Extension (North Dakota State University) · From the Garden or Orchard to the Table: Getting Started With Home Winemaking (FN1638, reviewed August 2026) · read on October 25, 2026
-
55
A hydrometer measures the gravity of the must
“A hydrometer is used to measure the SG of the must.”
NDSU Extension (North Dakota State University) · From the Garden or Orchard to the Table: Getting Started With Home Winemaking (FN1638, reviewed August 2026) · read on October 25, 2026
-
56
Must starts at 1.080 or higher
“Must has a starting SG of 1.080 (“ten-eighty”) or higher.”
NDSU Extension (North Dakota State University) · From the Garden or Orchard to the Table: Getting Started With Home Winemaking (FN1638, reviewed August 2026) · read on October 25, 2026
-
57
Add sugar in small amounts
“Add small amounts of sugar at a time to keep the SG from going higher than the recommended level.”
NDSU Extension (North Dakota State University) · From the Garden or Orchard to the Table: Getting Started With Home Winemaking (FN1638, reviewed August 2026) · read on October 25, 2026
-
58
Wine yeast, not baking yeast
“Be sure to use winemaking yeast; do not use baking yeast.”
NDSU Extension (North Dakota State University) · From the Garden or Orchard to the Table: Getting Started With Home Winemaking (FN1638, reviewed August 2026) · read on October 25, 2026
-
59
A wine yeast such as EC-1118 or K1-V1116
“Yeast, winemaking, such as EC-1118 or K1-V1116”
NDSU Extension (North Dakota State University) · From the Garden or Orchard to the Table: Getting Started With Home Winemaking (FN1638, reviewed August 2026) · read on October 25, 2026
-
60
Rehydrate the yeast as the maker directs
“Follow the manufacturer’s recommendations for rehydrating the wine yeast”
NDSU Extension (North Dakota State University) · From the Garden or Orchard to the Table: Getting Started With Home Winemaking (FN1638, reviewed August 2026) · read on October 25, 2026
-
61
The airlock lets gas out and keeps air and microbes out
“Fermentation locks: allows carbon dioxide to escape from fermenters and prevents oxygen and microbial contamination”
NDSU Extension (North Dakota State University) · From the Garden or Orchard to the Table: Getting Started With Home Winemaking (FN1638, reviewed August 2026) · read on October 25, 2026
-
62
An even 65–80 °F
“try to keep the must maintained at an even temperature between 65 and 80 degrees Fahrenheit”
NDSU Extension (North Dakota State University) · From the Garden or Orchard to the Table: Getting Started With Home Winemaking (FN1638, reviewed August 2026) · read on October 25, 2026
-
63
Fermentation may take 3 to 4 weeks
“Fermentation may take three to four weeks to complete.”
NDSU Extension (North Dakota State University) · From the Garden or Orchard to the Table: Getting Started With Home Winemaking (FN1638, reviewed August 2026) · read on October 25, 2026
-
64
Bubbles are normal, the yeast is eating the sugar
“As the juice starts to ferment, you will notice bubbles forming at the surface; this is normal and indicates that the yeast cells are consuming the sugar.”
NDSU Extension (North Dakota State University) · From the Garden or Orchard to the Table: Getting Started With Home Winemaking (FN1638, reviewed August 2026) · read on October 25, 2026
-
65
Fruit flies carry vinegar bacteria
“Keeping out any fruit flies is very important because they can transmit vinegar-producing bacteria to your wine.”
NDSU Extension (North Dakota State University) · From the Garden or Orchard to the Table: Getting Started With Home Winemaking (FN1638, reviewed August 2026) · read on October 25, 2026
-
66
Check the gravity after 3 to 5 days
“In three to five days, measure the specific gravity”
NDSU Extension (North Dakota State University) · From the Garden or Orchard to the Table: Getting Started With Home Winemaking (FN1638, reviewed August 2026) · read on October 25, 2026
-
67
At 1.020–1.030, take out the bag and squeeze the fruit
“when it has decreased to 1.020 to 1.030, remove the straining bag and squeeze the wine from the pulp”
NDSU Extension (North Dakota State University) · From the Garden or Orchard to the Table: Getting Started With Home Winemaking (FN1638, reviewed August 2026) · read on October 25, 2026
-
68
Leave the sediment behind
“try to keep from transferring much of the sediment at the bottom of the fermenter”
NDSU Extension (North Dakota State University) · From the Garden or Orchard to the Table: Getting Started With Home Winemaking (FN1638, reviewed August 2026) · read on October 25, 2026
-
69
No higher than the shoulders while it ferments
“do not fill above the shoulders of the carboy to allow for expansion during the remaining fermentation”
NDSU Extension (North Dakota State University) · From the Garden or Orchard to the Table: Getting Started With Home Winemaking (FN1638, reviewed August 2026) · read on October 25, 2026
-
70
Dry wine can drop as low as 0.990
“Finished dry wine can have an SG as low as 0.990 (“nine-ninety”).”
NDSU Extension (North Dakota State University) · From the Garden or Orchard to the Table: Getting Started With Home Winemaking (FN1638, reviewed August 2026) · read on October 25, 2026
-
71
Once it's done, fill it to just below the airlock
“After fermentation is complete, filling the carboy to within a few inches of the airlock is important; this prevents too much exposure to oxygen.”
NDSU Extension (North Dakota State University) · From the Garden or Orchard to the Table: Getting Started With Home Winemaking (FN1638, reviewed August 2026) · read on October 25, 2026
-
72
Top up with water or sanitized marbles
“Be sure to top up the carboy after each racking with water or a similar wine. Sanitized marbles can be placed in the carboy in lieu of topping up.”
NDSU Extension (North Dakota State University) · From the Garden or Orchard to the Table: Getting Started With Home Winemaking (FN1638, reviewed August 2026) · read on October 25, 2026
-
73
More rackings over weeks or months to leave the sediment
“For the next several weeks or months, additional racking from one container to another will be needed to remove the wine from the lees (sediment).”
NDSU Extension (North Dakota State University) · From the Garden or Orchard to the Table: Getting Started With Home Winemaking (FN1638, reviewed August 2026) · read on October 25, 2026
-
74
With sugar left or to sweeten it, potassium sorbate
“it should be used if your wine has residual sugar left after fermentation or if you plan to resweeten the wine before bottling.”
NDSU Extension (North Dakota State University) · From the Garden or Orchard to the Table: Getting Started With Home Winemaking (FN1638, reviewed August 2026) · read on October 25, 2026
-
75
Without sorbate, bottles can explode
“Failure to add potassium sorbate may cause bottles to explode if fermentation restarts.”
NDSU Extension (North Dakota State University) · From the Garden or Orchard to the Table: Getting Started With Home Winemaking (FN1638, reviewed August 2026) · read on October 25, 2026
-
76
Bottle it only off the sediment and clear
“Bottling and storage is the final step and should be done only when the wine has been racked off any remaining sediment and has achieved good clarity.”
NDSU Extension (North Dakota State University) · From the Garden or Orchard to the Table: Getting Started With Home Winemaking (FN1638, reviewed August 2026) · read on October 25, 2026
-
77
New wine bottles, or reused ones cleaned and sanitized
“Glass wine bottles: buy new bottles or reuse commercial wine bottles if they are thoroughly cleaned and sanitized”
NDSU Extension (North Dakota State University) · From the Garden or Orchard to the Table: Getting Started With Home Winemaking (FN1638, reviewed August 2026) · read on October 25, 2026
-
78
A no-rinse sanitizer on the bottles just before filling
“Just prior to bottling, rinse the bottle with a “no-rinse” sanitizing agent, then allow the bottle to drain before filling with wine.”
NDSU Extension (North Dakota State University) · From the Garden or Orchard to the Table: Getting Started With Home Winemaking (FN1638, reviewed August 2026) · read on October 25, 2026
-
79
No bleach or triclosan soaps on the bottles
“Never use bleach or antibacterial soaps containing triclosan when cleaning bottles.”
NDSU Extension (North Dakota State University) · From the Garden or Orchard to the Table: Getting Started With Home Winemaking (FN1638, reviewed August 2026) · read on October 25, 2026
-
80
Always new corks
“Always use new corks.”
NDSU Extension (North Dakota State University) · From the Garden or Orchard to the Table: Getting Started With Home Winemaking (FN1638, reviewed August 2026) · read on October 25, 2026
-
81
A few days upright, then on their sides
“After bottling, stand the bottles in an upright position for a few days to allow the cork to thoroughly expand, and then store the bottles on their sides until ready to use.”
NDSU Extension (North Dakota State University) · From the Garden or Orchard to the Table: Getting Started With Home Winemaking (FN1638, reviewed August 2026) · read on October 25, 2026
-
82
Age at least 2 months, and a year is better
“wine should be aged for at least two months, but one year of storage prior to consumption is better.”
NDSU Extension (North Dakota State University) · From the Garden or Orchard to the Table: Getting Started With Home Winemaking (FN1638, reviewed August 2026) · read on October 25, 2026
-
83
On their sides, somewhere cool and dark
“Store wine bottles on their sides in a cool, dark place.”
NDSU Extension (North Dakota State University) · From the Garden or Orchard to the Table: Getting Started With Home Winemaking (FN1638, reviewed August 2026) · read on October 25, 2026
-
84
No alcohol for anyone under the legal drinking age
“People under the legal drinking age”
NDSU Extension (North Dakota State University) · From the Garden or Orchard to the Table: Getting Started With Home Winemaking (FN1638, reviewed August 2026) · read on October 25, 2026
-
85
Nor if you are or may be pregnant
“Pregnant women and those who may be pregnant”
NDSU Extension (North Dakota State University) · From the Garden or Orchard to the Table: Getting Started With Home Winemaking (FN1638, reviewed August 2026) · read on October 25, 2026
-
86
Calibrate the pH meter before measuring
“Before we can test the pH of a product, we need to calibrate the meter.”
Oregon State University Extension Service · pH meter calibrating and testing for pickled food products (video transcript, 2022) · read on October 26, 2026
-
87
When it's done, below 1.000: alcohol is lighter than water
“It should be less than 1.000 (alcohol is lighter than water; the sugar has all been converted to alcohol and CO2).”
Virginia Cooperative Extension (Virginia Tech) · Wine making for the home gardener (HORT-213) · read on October 26, 2026
-
88
Watch for pushing corks: a sign of fermentation in the bottle
“monitor for pushing corks, a sign of fermentation in the bottle, and for carbonation/sediments.”
Virginia Cooperative Extension (Virginia Tech) · Wine making for the home gardener (HORT-213) · read on October 26, 2026
-
89
Sorbate alone won't stop a fermentation
“Sorbates will not stop a ferment on their own”
University of Vermont Extension (T. Bradshaw) · Commercial Production of Unpasteurized and Fermented Ciders in Vermont (2010) · read on October 25, 2026
-
90
If it molds, throw it out
“If you confirm mold growth on any part of a ferment, it should be immediately discarded.”
UC Davis, Department of Food Science and Technology · Common issues with fermented fruits and vegetables (v1.0, 15-mar-2022) · read on October 20, 2026
-
91
In the US you can make wine at home, but not distill
“While individuals of legal drinking age may produce wine or beer at home for personal or family use, Federal law strictly prohibits individuals from producing distilled spirits at home”
Alcohol and Tobacco Tax and Trade Bureau (TTB, U.S. Department of the Treasury) · Home Distilling · read on October 25, 2026
-
92
Wine made for personal use may never be sold
“wine produced for personal or family use may never be sold or offered for sale”
Alcohol and Tobacco Tax and Trade Bureau (TTB, U.S. Department of the Treasury) · Wine FAQs · read on October 25, 2026
-
93
UK, no duty if it's for your own use and not a spirit
“by a person who produces alcoholic products only for the person’s own domestic use, and (b)are not spirits.”
UK legislation (legislation.gov.uk, The National Archives) · Finance (No. 2) Act 2023, section 72: Exemption: production for personal consumption · read on October 25, 2026